
Since the beginning of our table and chair refurb, I have sincerely begun falling in love with this space in our house. It’s my favorite place to congregate and mingle with my tiny family and when we have guests. There’s just something special that happens around a dinner table; something that I can’t fully put into words. But it’s a bonding place. A sharing space. And I have become quite dedicated to getting it finished. Minus the unfinished chair pictured above, of course. Still a little ways to go, but it’s a process!
That being said, we have this stage of space between two side windows that just would not leave me alone since we moved here. It’s quite a large space of wall, perfect for something(s) to hang and display. However, as you can see from the photo, I already have a photo collage wall going on, so I didn’t want to go overboard and tack up every photo to my name – even though I am a photo fanatic. *There’s also a photo board display on the adjacent wall that you cannot see in the pic.* So I felt like I needed a centerpiece. Something to sum up my heart for our dining room. And then I came across this little diddy on Pinterest one day.
Granted, the ombre rainbow effect didn’t seem like the solution for our room, but the concept I was a total fan of. We don’t have anything else like this in our home, and it seemed like an easy enough project that would make a big statement. My original plan was to just replicate from the tutorial exactly, except for the colors.
But I ran into a couple of issues at my local home improvement stores when I went to get supplies:
- those rolls of cork board are ssssssuper thin, and cost nearly $10 PER roll;
- I couldn’t find linoleum nails
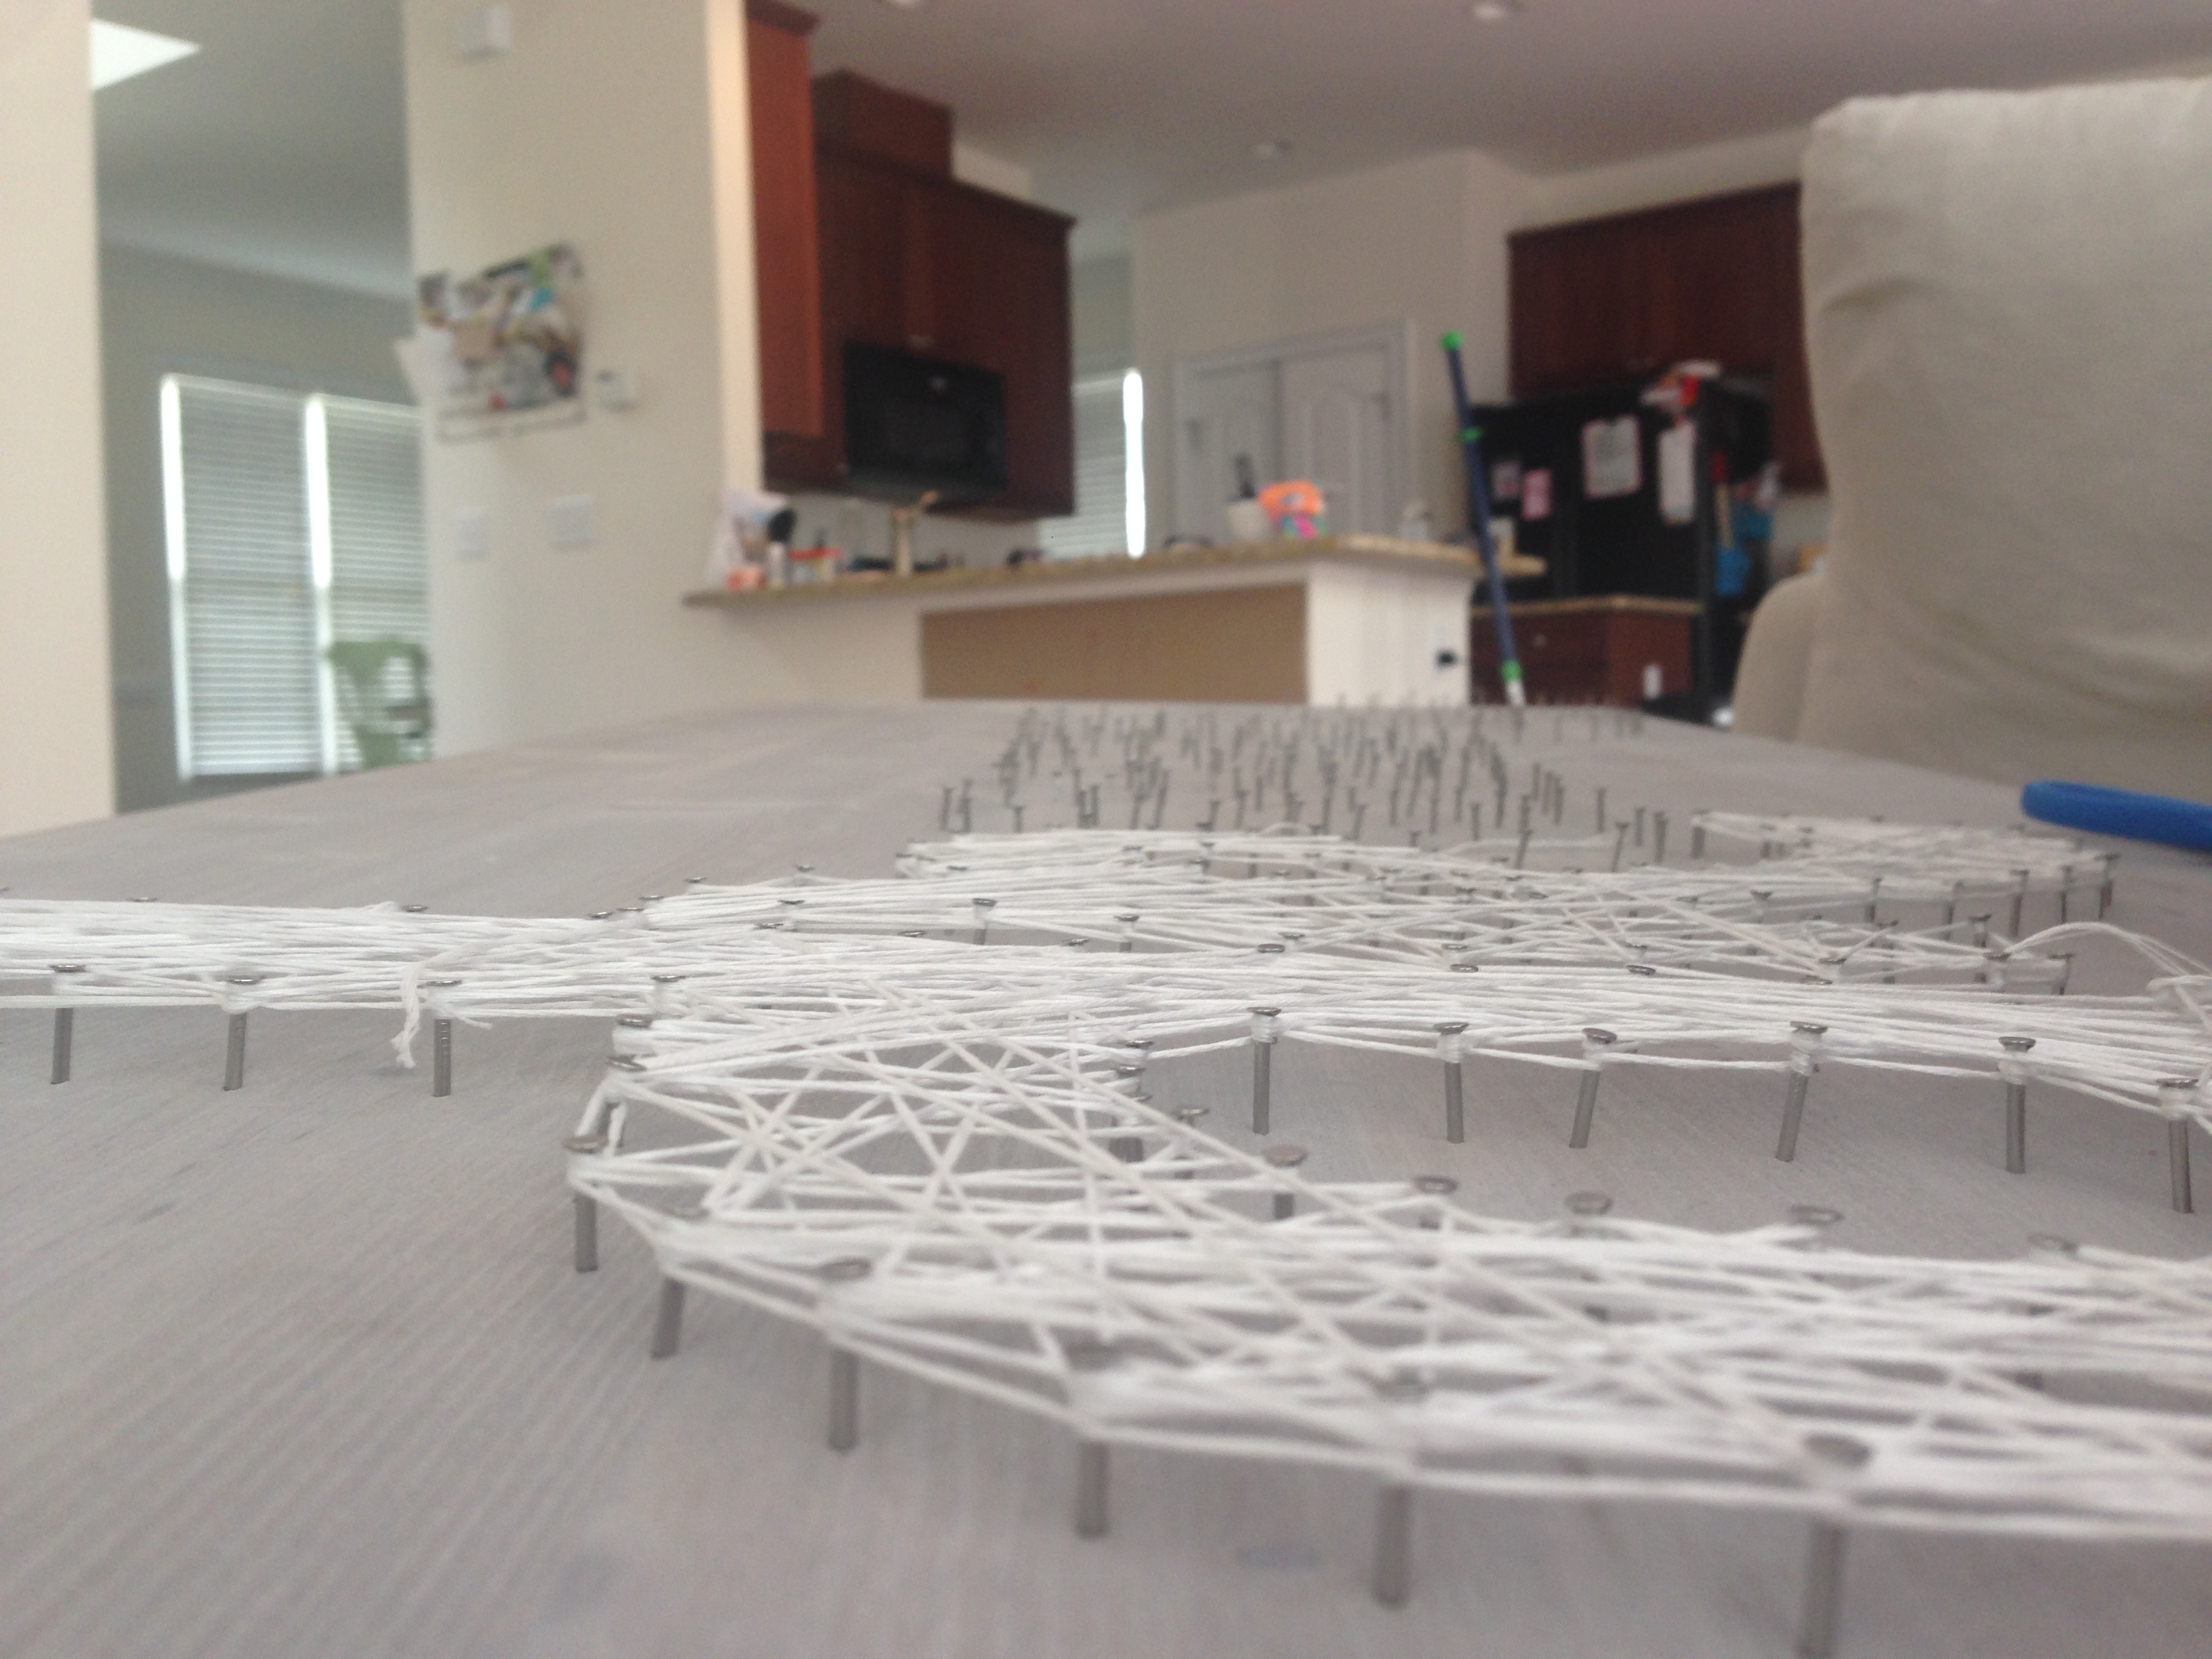
So Jeremy and I walked through the store and began improvising. We found some awesome prefab wood, already cut to the size we needed (2ftx4ft), and it was ready for stain. And at $15, I knew the price and the strength would work better for us. So we grabbed our board, and about twelve thousand 3/4″ nails (with flat heads so the string will stay wrapped), and went home to get started.
My vision for the color was white-washed wood. I wanted some contrast between the backdrop and the “dream” verbiage, so I went out on a limb, found a few tutorials on how to get a white-washed look, and I just worked with what I had around the house. My partner in crime was by my side to offer her usual critiques…

I started by just wiping on one coat of Rust-oleum Dark Walnut stain. The color turned out great enough that I would’ve been fine leaving it that way IF we didn’t already have so much wood color throughout our dining room. (Too bad I don’t have photos of this part.) The dark table top, the photo display boards, the wood flooring, some of the frames on the wall… It needed to be lighter, but still stand out. So once the stain dried, I brushed on some watery antique-white latex paint that I thinned out by using a ratio of 3/4cups water to 1/4cup paint. Just mixed it really well, brushed it on over the stain, and then wiped it off in horizontal swipes before it dried. I did this over and over again until I liked the way it looked. The end result was a nice gray color, but it still looks like wood. You can see the grain, and it just looks aged. Which I like. Let it dry overnight.

The template part was the hardest part for us. Thanks to my computer genius husband, he was able to create a large enough template of the word “dream” in paint.net for me. I wish I could give step by step instructions on how to do that, but it’s way over my head. I know it had something to do with enlarging the canvas size in the program, but seriously, that’s as far as it goes for me. You’d probably just be better off free-handing it on some craft paper and cutting it out. Or if you’re savvy with Photoshop or the likes, I’m sure there are some tutorials or guides out there on how to make one. Ehh. Sorry.
But essentially, you just need a template big enough for your background, that you can tape onto the surface, and trace it out with nails. Just be careful not to space your nails too far apart. A good 1/4inch between each one is good, I think.
Actually, who am I kidding? Ha! This is a project easy enough that you can just look at it and make it.
Once I got the verbiage outlined with nails, I just carefully removed the paper. And voila! Ready for embroidery floss.


I chose white embroidery floss. I like white. It’s my go-to these days. And I won’t call it a color, since I know my software engineer husband reads my blog and would probably mumble something sarcastically under his breath about how white is NOT a color, but rather the absence of color. So in our house, it’s just white. It’s crisp, and clean, and it just makes me happy. Not to mention, you can add just about any color to accent it. And I thought the bright contrast would be nice against the darker background.
Just tied it tight around an anchor nail, and began winding and weaving and stringing it along until each letter was filled in how I liked it. Then tied it off again to secure it when finished.
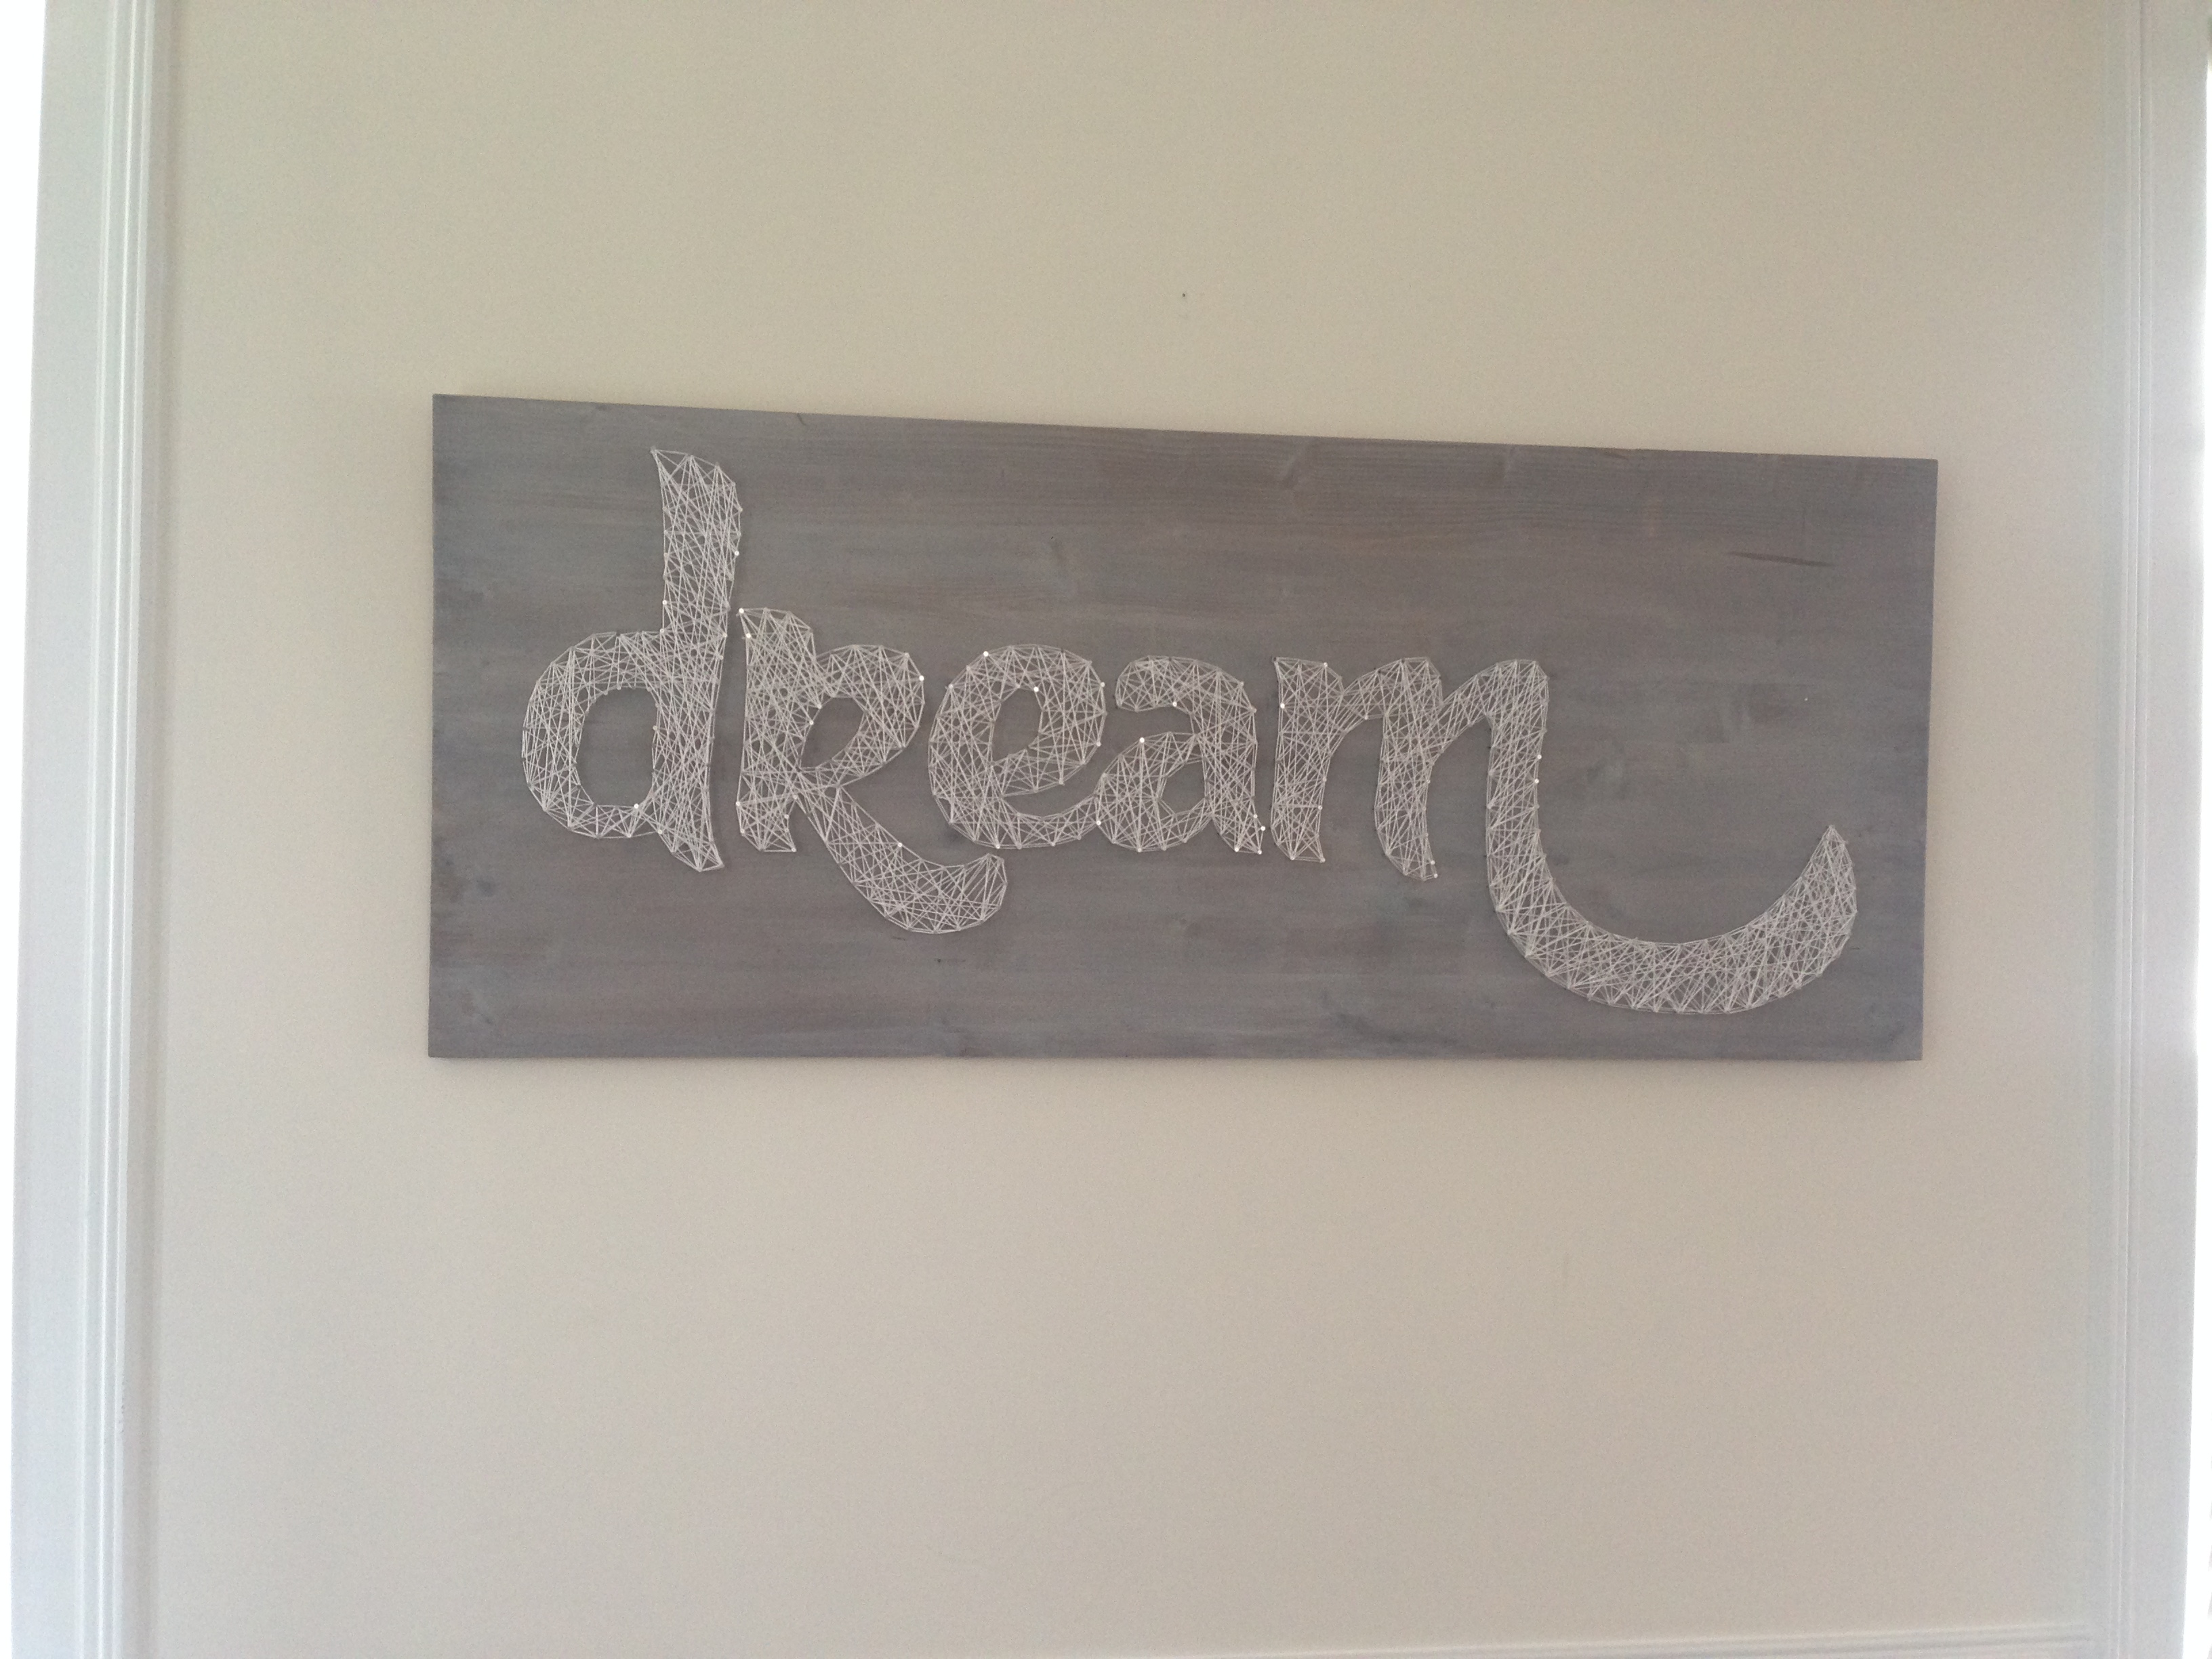
I am loving this new piece in our dining room. It was inexpensive to make and hang, and I feel like it adds a little more originality to our special gathering place. I love the verbiage and what it means to our little family in this new season of life we are in. To enjoy a meal around our little table together has become one of my absolute favorite things. So many conversations and memories are shared while we eat and dream of the future together. I’m glad to have this hanging right in my line of sight when I walk into the room everyday.
Can’t wait to show you what’s next! I love a good DIY project.


 Believer. Wife. Mom. Foodie. DIYer. Adoption advocate. Amateur iPhone photographer. On an adventure, learning to embrace every part. And this is where I document it all. Residing in Morrisville, NC with my husband and daughter. Starting afresh every morning.
No Comments