We moved over 700 miles from home just a few months ago. The move came suddenly and unexpectedly, so to relieve ourselves a little with moving expenses, and for the sake of room in the 17ft truck, we sold nearly every piece of furniture we owned. And upon arriving in North Carolina, we almost immediately started over with furnishing the house. Craigslist has been a huge help, and I’m telling you – people here get rid of the best stuff!
We started with the priorities (which is an ironic statement if you noticed the title of this post)
- dining room table
- beds
Things of the likes.
Our first purchase actually did include a dining room table, but that awesome reveal is still to come very soon!
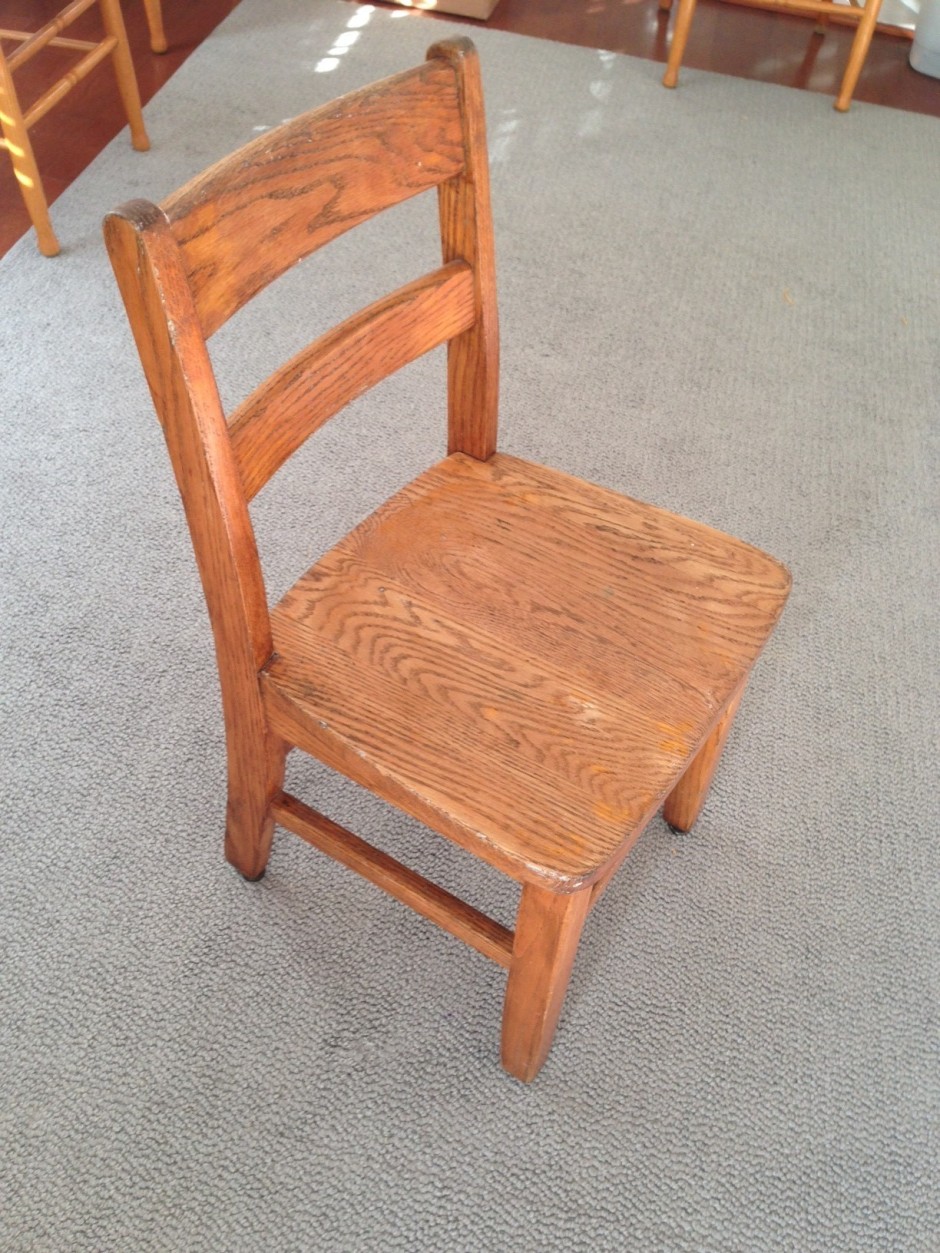
However, as my husband and the sweet guy we bought the table from were loading the furniture, this tiny chair caught our eyes.
My husband immediately thought it would be a cute addition to a built-in desk nook we have in our kitchen, but it turned out to be too small. From there, it was a no brainer to this momma of what this tiny chair would be of great use for.
Pictured above is the chair in the state we bought it in. Totally basic. Needing a good cleaning. Old. Sad.
But everything was in tact, completely sturdy, and I could tell this would be a chair to keep on going for years and years to come.
I can picture Selah sitting in it when she comes home from college.
*I’ve learned through experience to never buy wooden chairs that are wobbly. We are not wood-workers, so when they start falling apart, we have no idea what we’re doing to stabilize them.*
This refurb was so easy. I didn’t sand anything, prime anything, and from start to finish, it probably took a day and a half to complete – and about 90% of that was drying time.
I gave the whole chair a good wipe down with a wet rag. Just to make sure the surface was free of any gunk causing raised spots and such. Stains didn’t matter so much, as I was about to cover them anyway.
From there, I brought the chair inside, set it on a tarp, and mixed my first batch of paint.
……
So for the paint. Oh the paint. You can spend hours researching everyone’s opinions on the best solutions for painting wood. And I mean it when I say there are no shortages of opinions.
Those who think it’s a tragedy to paint over wood, and those who paint every square inch of wood.
Those who are partial to Annie Sloan, and those who think the price is overrated.
Those who warn against the stupidity of not sanding your piece, and those who would give their life to prove that sanding isn’t necessary.
Chalk paint lovers, and chalk paint loathers.
It’s a trip.
I just know from my experience, I knew I wanted durability. I wanted paint that wasn’t going to flake or peel when it gets roughed up a bit – and in my house, the probability that this chair will get roughed up a bit is high. So ultimately, I went the chalk paint route. Homemade chalk paint. Made with plaster of paris. Genius.
And let me preface this: when I say chalk paint, I’m not talking about chalkboard paint. I just mean giving your paint a chalky consistency and finish. We’re not gonna be pulling out our chalk sticks and doodling on our furniture, here. If that’s what you want, you can buy chalkboard paint, already mixed and ready for you on a shelf and Lowes.
So onto the recipe I used.
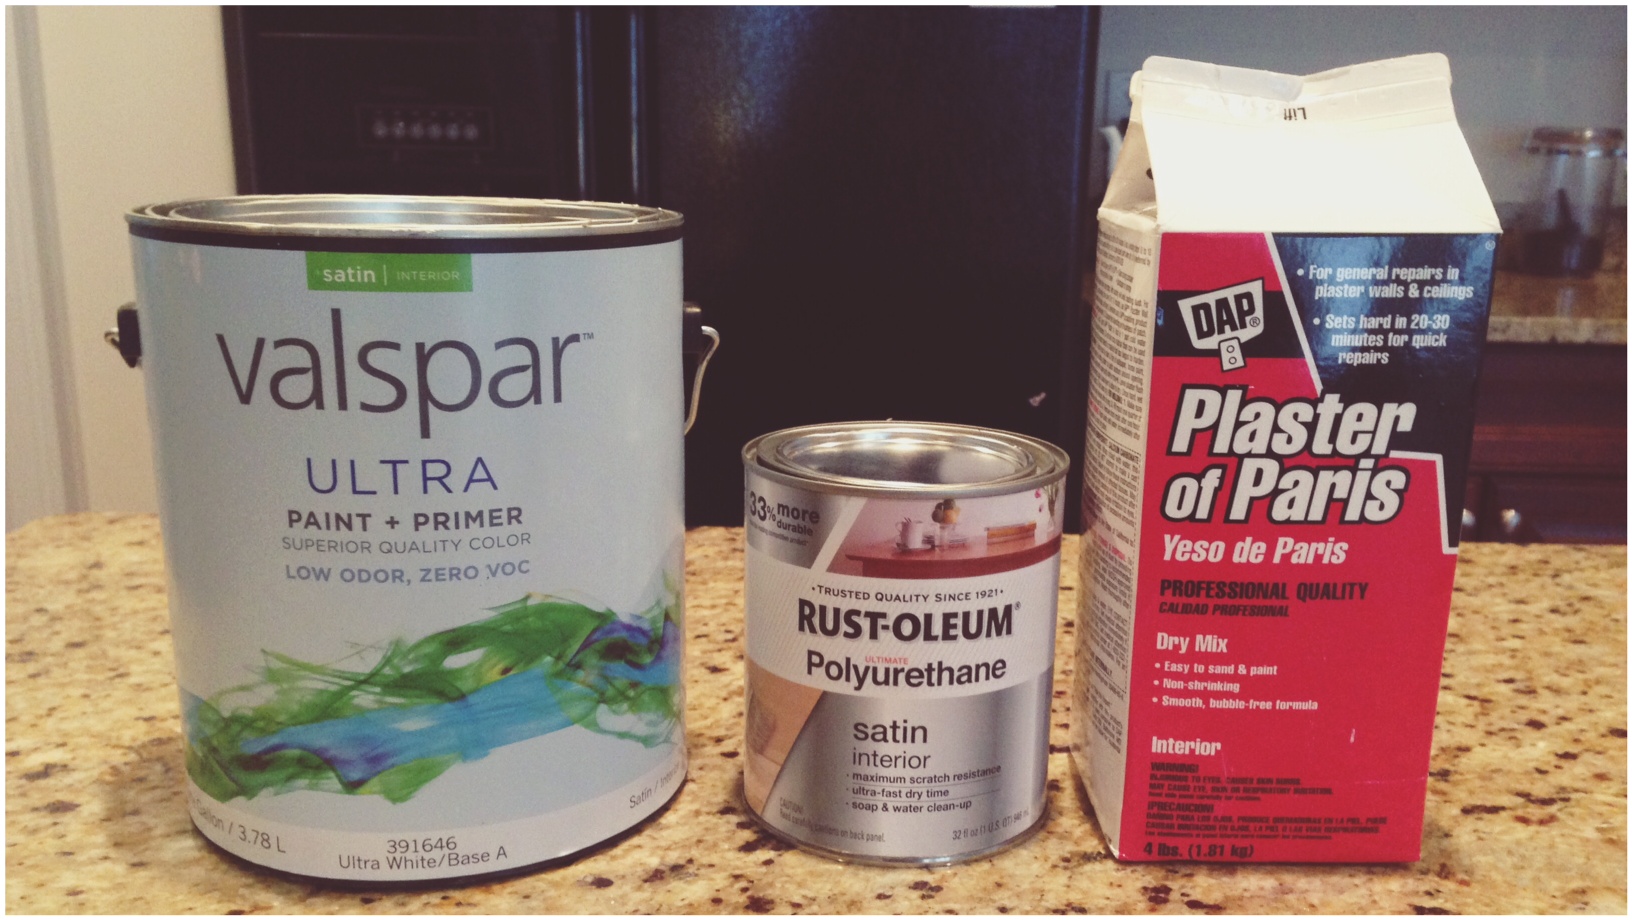
*The Rust-oleum polyurethane pictured was only used as the top coat. Do not mix this with your paint.
Ingredients
- Dap Plaster of Paris (You can find this 4lb carton at Lowes for just over $6.00. This means leftovers for tons more projects.)
- Valspar Ultra Paint+Primer satin interior paint (I used Valspar’s ‘Honeymilk’)
- Water
You will find an overwhelming amount of recipes regarding how much plaster to add to your paint. But because my project was small, I started small, and I only measured one cup of paint. To that, I used a 2:1 ratio of plaster to water. In a tiny separate bowl, I mixed 1 tablespoon of plaster with 1/2 tablespoon of water. Mixed that until it was smooth and free of lumps, and then mixed that mixture in with my 1 cup of paint. Mixing is key, here, can’t ya tell?
I found that this 2:1 plaster to water ratio was just enough. If you add too much plaster of paris to not enough paint, your mixture will be like brick mortar. Too thick. Nasty.
But not enough, and you won’t get that hard, chalky finish.
Also, this method of chalk paint dries very quickly. So work fast!
It only took two coats (minus the polyurethane top coat) to get the antique white look I wanted. The first coat, I just slapped on, not being very careful or precise with my paintbrush. Just go for it, and get that paint on there!
Here’s the chair after the first coat of chalk paint.
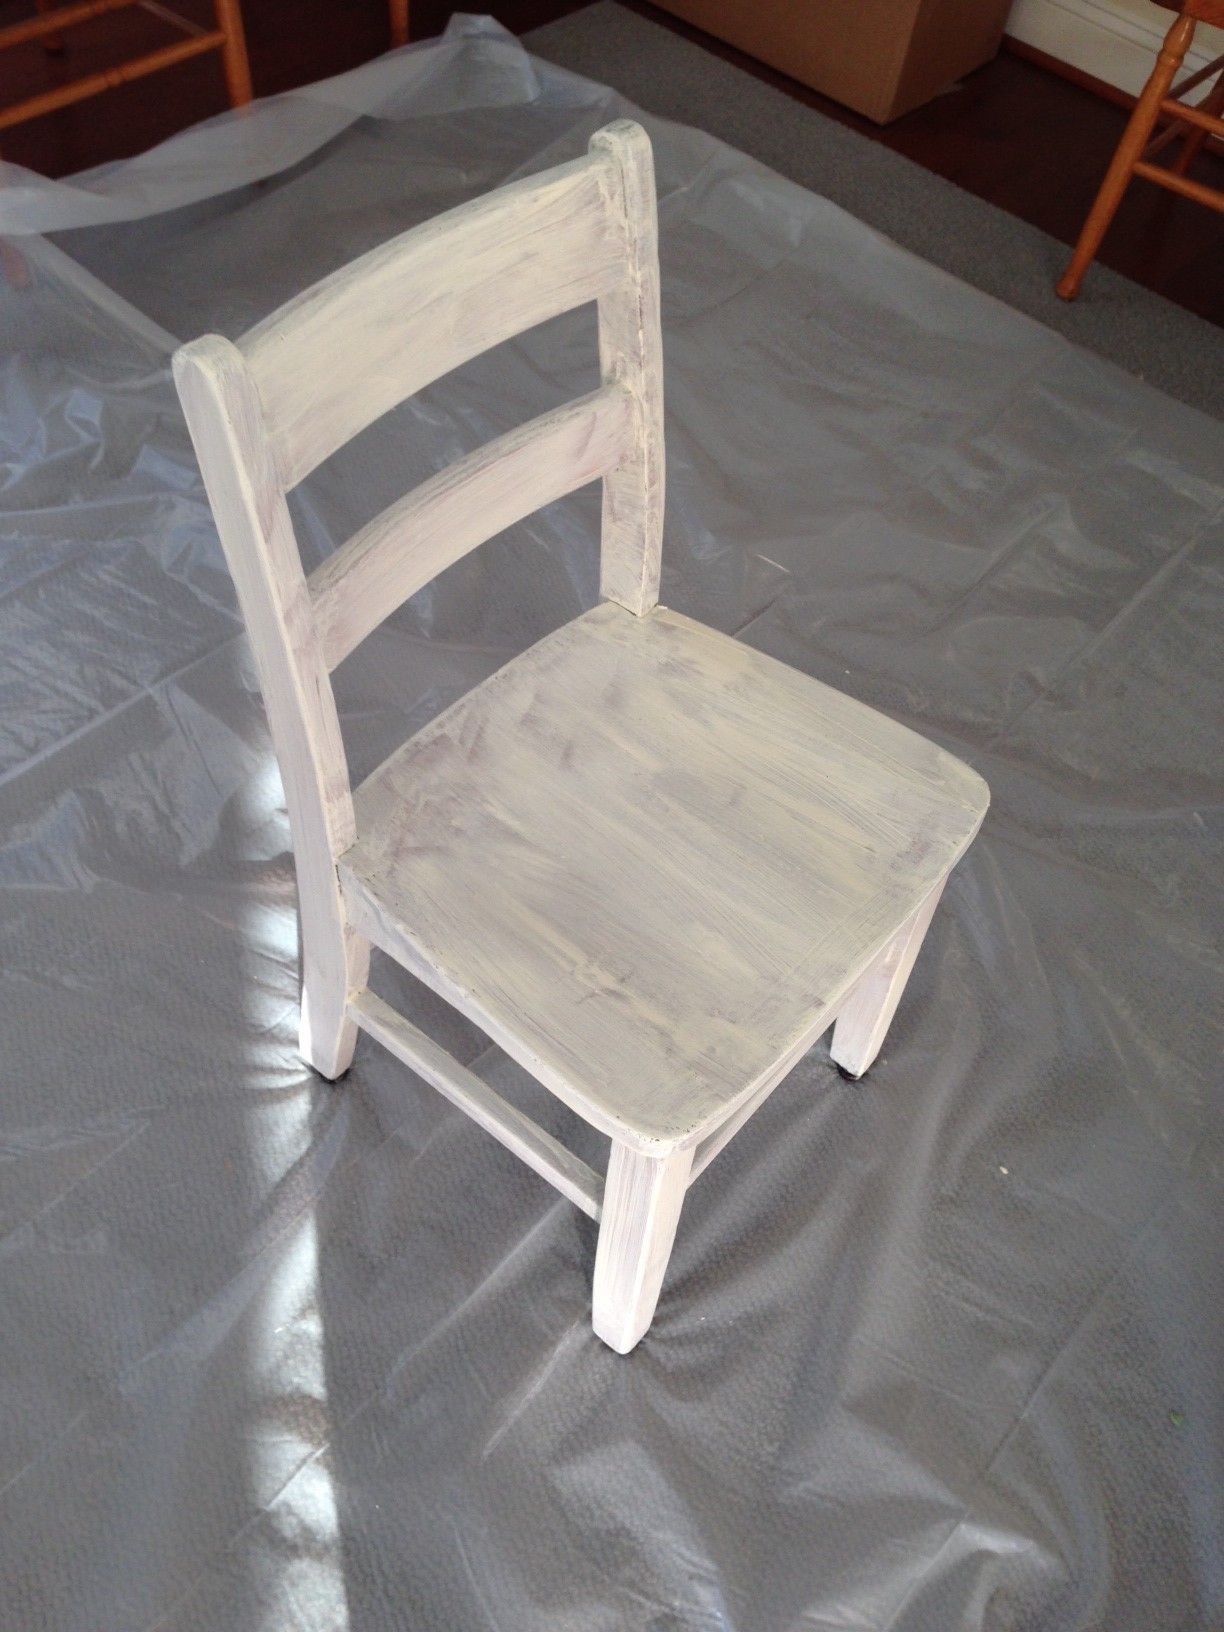
See those beautiful strokes? Ha!
The second coat went on much smoother, and covered those frantic brush strokes quite nicely. And wouldn’t you know I don’t have a photo of that phase?
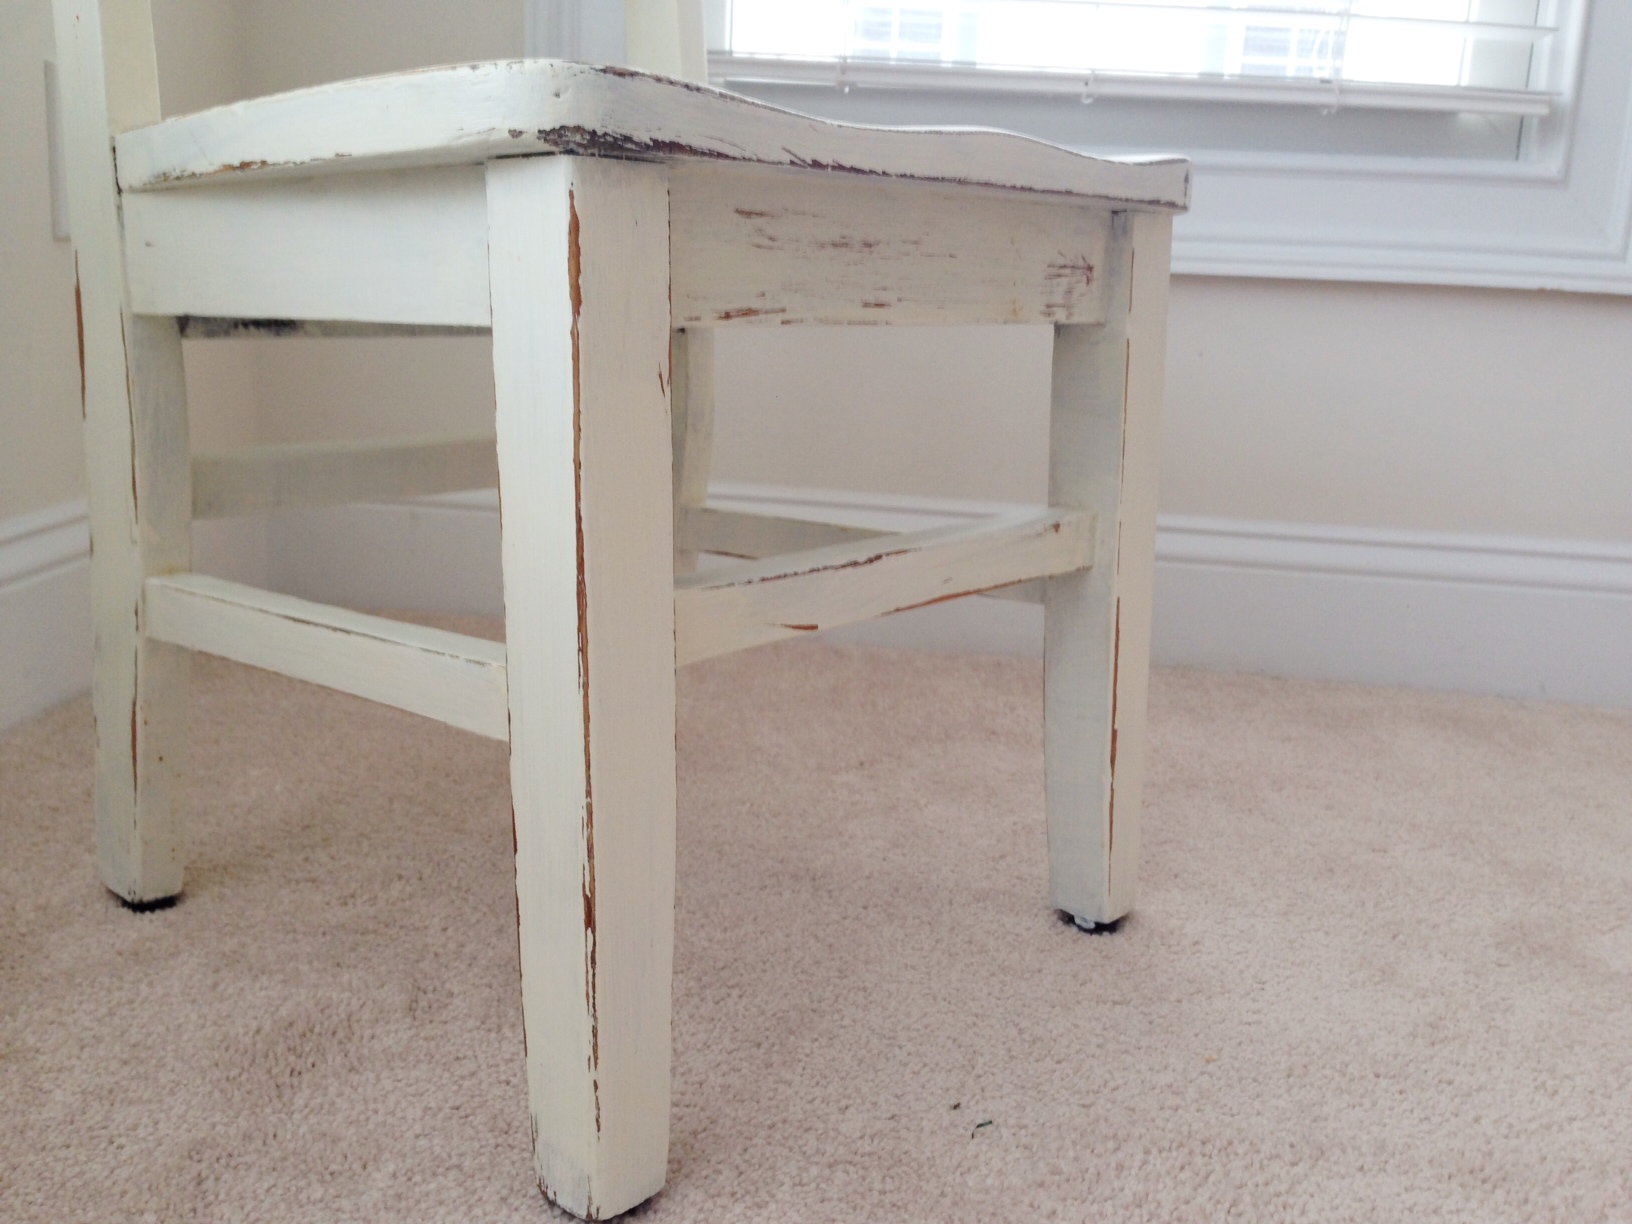
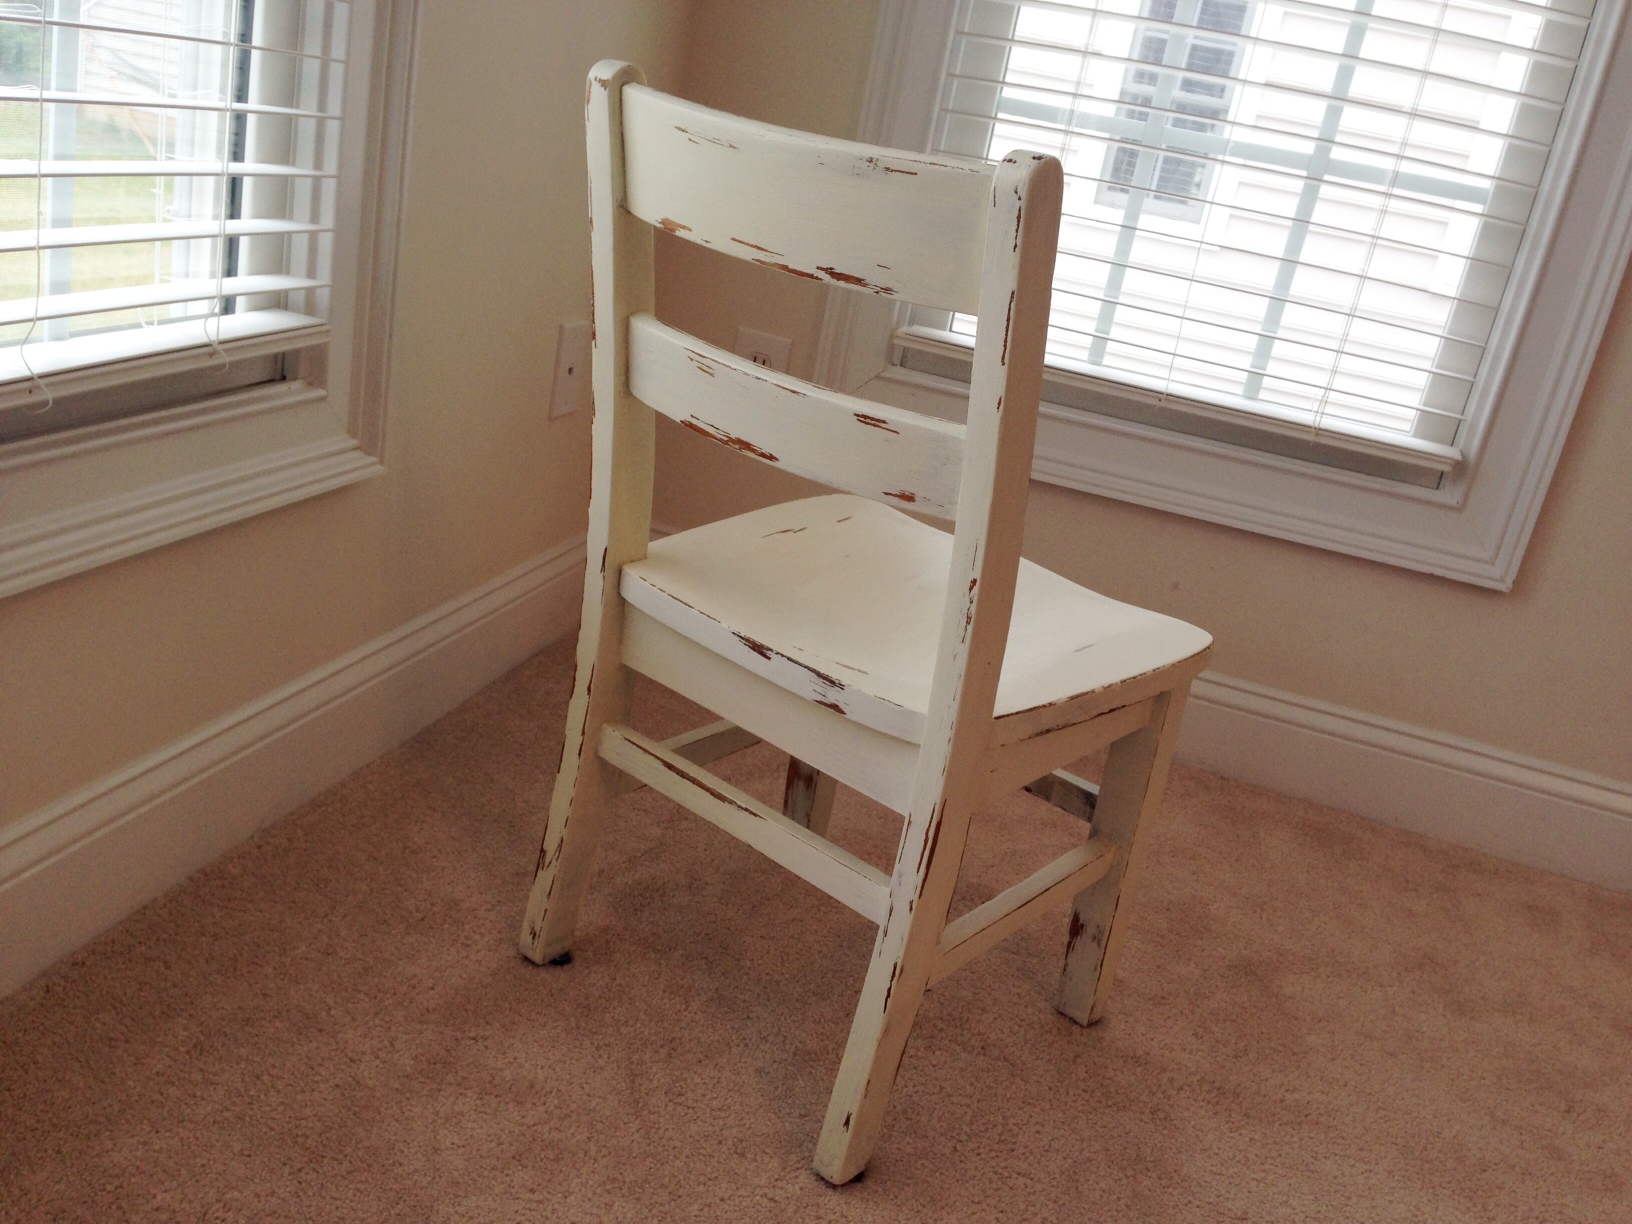
From there, I let it dry completely, and then took a high-grit sandpaper block (I think I remember using 120 grit) and just distressed it a little. Nothing too crazy. I just tried to rough up the areas that naturally get the most wear: edges, corners, etc..
I’m not a fan of overly distressed furniture. Just make it look as natural as possible, please. Natural is always better. *Ahem*
Now you’re ready for a top coat. This will just protect all that work you just did. It’s worth the extra step, I promise. I like Rust-oleum products. And I like this water-based Polyurethane. It will help protect from scratches, water stains, or as my daughter has already tried to test out on our sweet new chair, spaghetti sauce! The gunk will wipe right off! Top coats are worth it, I promise.
And nothing fancy, here. Just get a paint brush, and go for it. One coat for a project like this is good enough.
……
Other than letting your piece sit, or “cure” for a few days, that’s it, folks! That’s all there is to it. Now you just stand back and admire your handy work. Fun, huh?

I think we paid $20 for this little chair. And because I’ll be using alllllll of these featured products on more projects to come, I’ll estimate the fractional cost (1 cup of paint, 1 tablespoon of plaster, and maybe a half-cup of polyurethane) to be about $1.50.
So about $21.50 for a life-long piece of furniture for our home. I’ll take it!
DIY, people. DIY.


 Believer. Wife. Mom. Foodie. DIYer. Adoption advocate. Amateur iPhone photographer. On an adventure, learning to embrace every part. And this is where I document it all. Residing in Morrisville, NC with my husband and daughter. Starting afresh every morning.
1 Comment
Hi Jess. Great job on the chair. Do you know the brand and color of your walls in that room? I’d love to know.